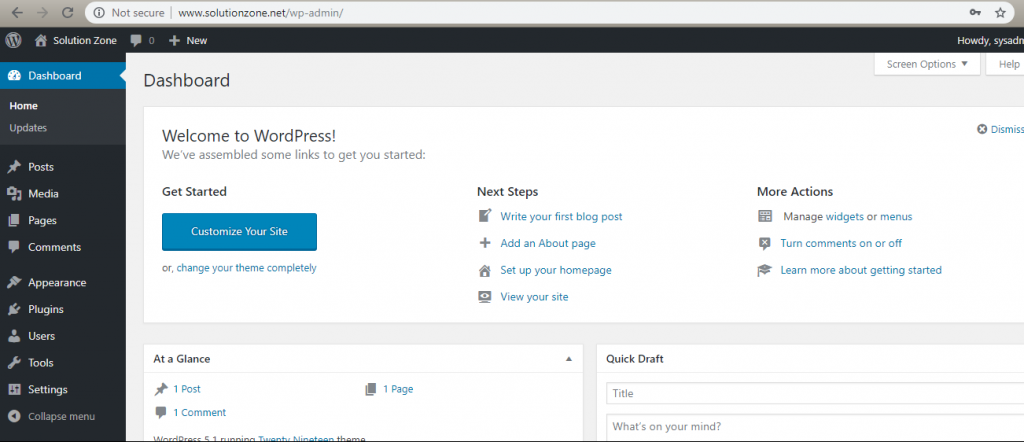
Hi Folks! this is my first post and in this article I am going to share a helpful knowledge with you. Basically, I have installed and configure the website you’re viewing on Microsoft Azure platform on a Ubuntu 18.04 virtual machine.
So, I am writing this article for you if you’re also planning to create your own website with WordPress by using LAMP packages.
Apache Installation:
First of all, make sure that all the packages on your installation of Ubuntu are up to date.
# sudo apt-get update

To install Apache2 on Ubuntu, run the commands below:
# sudo apt install apache2

Now, Start and enable apache2 service

Go to browser and type the name of domain name or ip:

Install MySQL Database Server
Next, we need to install MySQL database server by running the command below:
# sudo apt-get install mysql-client mysql-server

Then, start and enable Mysql service:

After that, run the commands below to secure Mysql DB server by creating a root password and disallowing remote root access.
# sudo mysql_secure_installation

When prompted, answer the questions below by following the guide.
- Enter current password for root (enter for none): Just press the Enter
- Set root password? [Y/n]: Y
- New password: Enter password
- Re-enter new password: Repeat password
- Remove anonymous users? [Y/n]: Y
- Disallow root login remotely? [Y/n]: Y
- Remove test database and access to it? [Y/n]: Y
- Reload privilege tables now? [Y/n]: Y
After that, restart Mysql server service:

Install PHP 7.1 and Related Modules
PHP 7.1 may not be available in Ubuntu default repositories… in order to install it, you will have to get it from third-party repositories.
# sudo apt-get install software-properties-common
# sudo add-apt-repository ppa:ondrej/php
# sudo apt update

Finally, run the commands below to install PHP 7.1 and related modules..
# sudo apt install php7.1 libapache2-mod-php7.1 php7.1-common php7.1-mbstring php7.1-xmlrpc php7.1-gd php7.1-xml php7.1-mysql php7.1-cli php7.1-mcrypt php7.1-zip php7.1-curl

After install PHP 7.1, run the commands below to open PHP-FPM default file.
# sudo vim /etc/php/7.1/apache2/php.ini
The value below are great settings to apply in your environments.
file_uploads = On
allow_url_fopen = On
memory_limit = 256M
upload_max_filesize = 100M
max_execution_time = 360
date.timezone = Asia/Karachi
Create new Database for WordPress
To logon to MySql database server, run the commands below.
# sudo mysql -u root -p

Then create a database called WordPressDB
# CREATE DATABASE WordPressDB;

Create a database user called dbadmin with new password
# CREATE USER ‘dbadmin’@’localhost’ IDENTIFIED BY ‘new_password_here’;

Then grant the user full access to the database.
# GRANT ALL PRIVILEGES ON *.* TO ‘dbadmin’@’localhost’ IDENTIFIED BY ‘password’;

Finally, save your changes and exit.
# FLUSH PRIVILEGES;
# EXIT;

Download WordPress Latest Release
After downloading, run the commands below to extract the downloaded file and move it into a new WordPress root directory.
# cd /tmp && wget https://wordpress.org/latest.tar.gz

# tar -zxvf latest.tar.gz

# sudo mv wordpress /var/www/html/wordpress

Then run the commands below to set the correct permissions for WordPress to function.
#sudo chown -R www-data:www-data /var/www/html/wordpress/
# sudo chmod -R 755 /var/www/html/wordpress/

Configure Apache2 HTTP Server
Finally, configure Apache2 site configuration file for WordPress. This file will control how users access WordPress content. Run the commands below to create a new configuration file called wordpress.conf
# sudo nano /etc/apache2/sites-available/wordpress.conf
Then copy and paste the content below into the file and save it. Replace the highlighted line with your own domain name and directory root location.
<VirtualHost *:80>
ServerAdmin admin@example.com
DocumentRoot /var/www/html/wordpress/
ServerName example.com
ServerAlias www.example.com
<Directory
/var/www/html/wordpress/>
Options
+FollowSymlinks
AllowOverride All
Require all granted
</Directory>
ErrorLog
${APACHE_LOG_DIR}/error.log
CustomLog
${APACHE_LOG_DIR}/access.log combined
</VirtualHost>
Enable the WordPress and Rewrite Module
After configuring the VirtualHost above, enable it by running the commands below… the commands also disable PHP7.0 and enable PHP 7.1 for Apache2.
# sudo a2ensite wordpress.conf
# sudo a2enmod rewrite

Restart Apache2
To load all the settings above, restart Apache2 by running the commands below.
# sudo systemctl restart apache2.service
CONFIGURE WORDPRESS
Now that Apache2 is configured, run the commands below to create WordPress wp-config.php file.
# sudo mv /var/www/html/wordpress/wp-config-sample.php /var/www/html/wordpress/wp-config.php

Then run the commands below to open WordPress configuration file.
# vim /var/www/html/wordpress/wp-config.php
Enter the highlighted text below that you created for your database and save.
// ** MySQL settings – You can get this info from your web host ** // /** The name of the database for WordPress */ define(‘DB_NAME’, ‘wpdb’); /** MySQL database username */ define(‘DB_USER’, ‘wpdbuser’); /** MySQL database password */ define(‘DB_PASSWORD’, ‘user_password_here’); /** MySQL hostname */ define(‘DB_HOST’, ‘localhost’); /** Database Charset to use in creating database tables. */ define(‘DB_CHARSET’, ‘utf8’); /** The Database Collate type. Don’t change this if in doubt. */ define(‘DB_COLLATE’, ”);
After that, open your browser and browse to your domain name to launch WordPress configuration wizard.
You should see WordPress setup wizard to complete. Please follow the wizard carefully.


Congratulations! You’ve successfully installed WordPress on Ubuntu.
Secure Apache with Let’s Encrypt on Ubuntu 18.04
Installing Certbot
First, add the repository:
# sudo add-apt-repository ppa:certbot/certbot
You’ll need to press ENTER to accept.

Install Certbot’s Apache package with apt:
# sudo apt install python-certbot-apache

Set Up the SSL Certificate
# sudo certbot –apache -d example.com -d www.example.com


Thank you for some other informative blog. Where else could I get that kind
of info written in such a perfect approach? I have a mission that I
am simply now working on, and I have been on the look out for such information.
Hi, Thanks for your comment. What kind of perfect approach you’re looking for…?
I have been exploring for a little for any high-quality articles or weblog posts on this sort of house . Exploring in Yahoo I eventually stumbled upon this web site. Studying this information So i?¦m happy to express that I’ve a very just right uncanny feeling I came upon exactly what I needed. I such a lot surely will make certain to do not omit this website and provides it a glance on a continuing basis.
Your credit restore effort calls for endurance, particularly if dealing using credit score bureaus.
Try wearing a blue winter scarf to provide more depth to your fashion integrity.
Brand is the vital word for just. http://wholesale-parts.net/__media__/js/netsoltrademark.php?d=kslot.app%2Findex.php%2Fgames%2Fsky777
I am interested in more information. How can I contact you?
You can reach me out at adeel.aleem@solutionzone.net
you are a great writer!
I feel this is one of the such a lot vital information for me. And i am satisfied reading your article. But should commentary on few normal issues, The site taste is perfect, the articles is truly excellent : D. Just right activity, cheers